Preparing For Dallara Body Kit

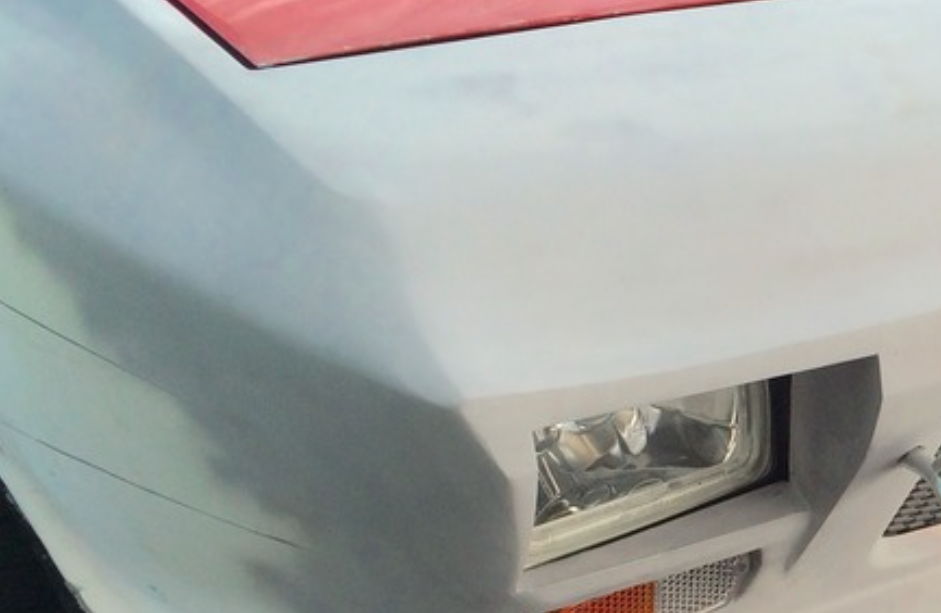
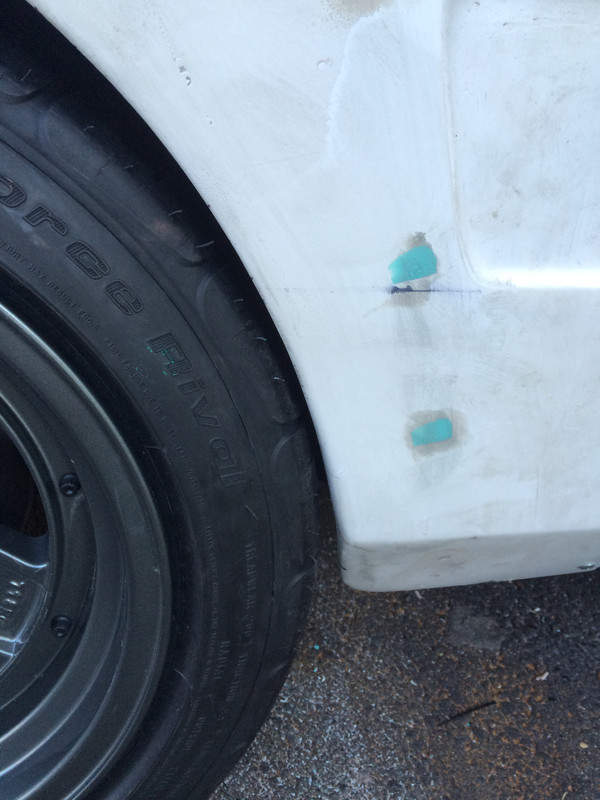
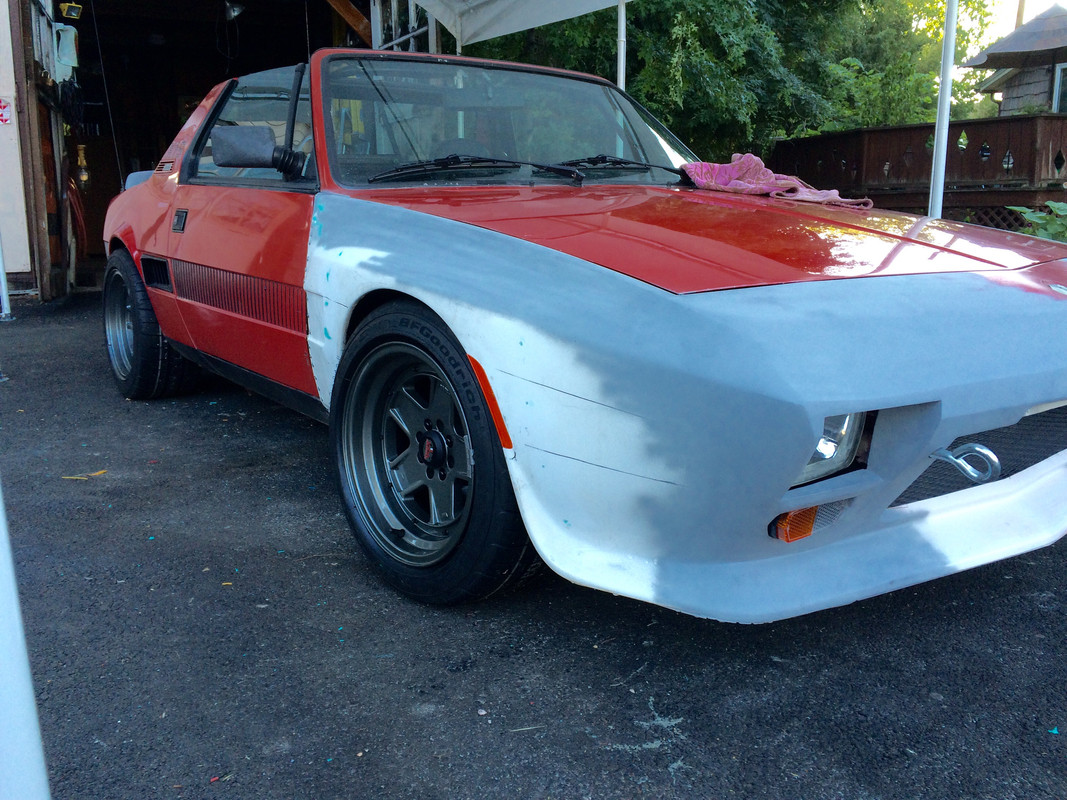
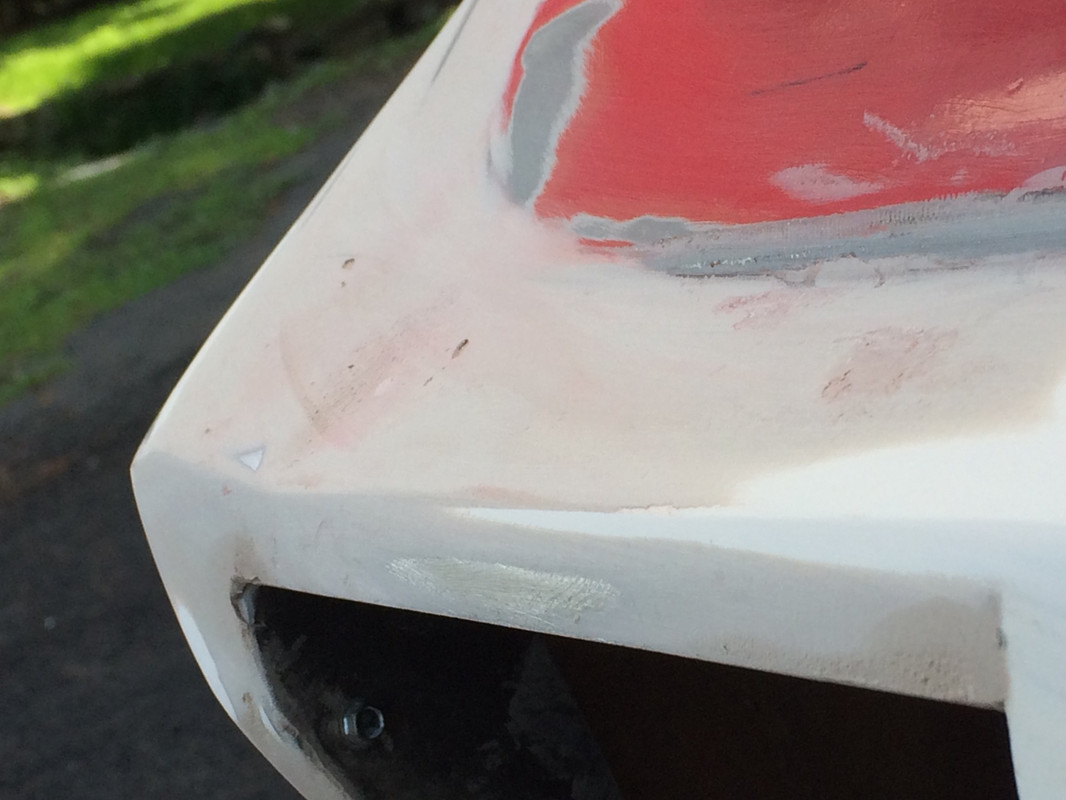
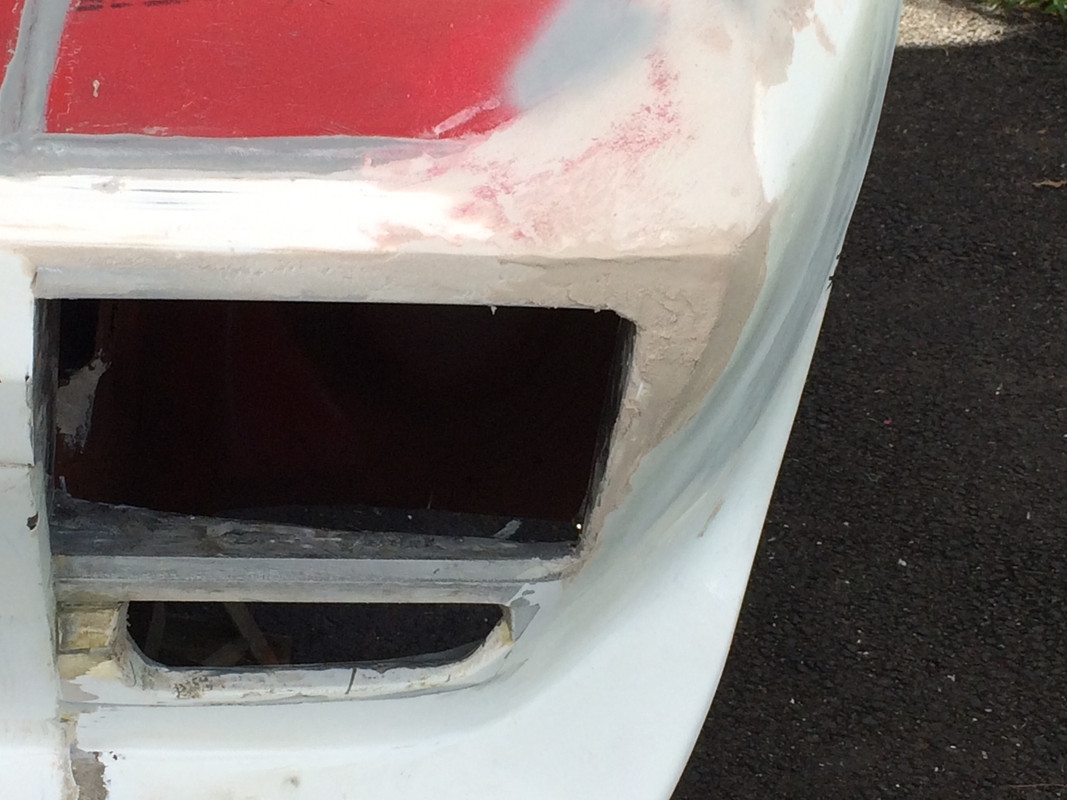
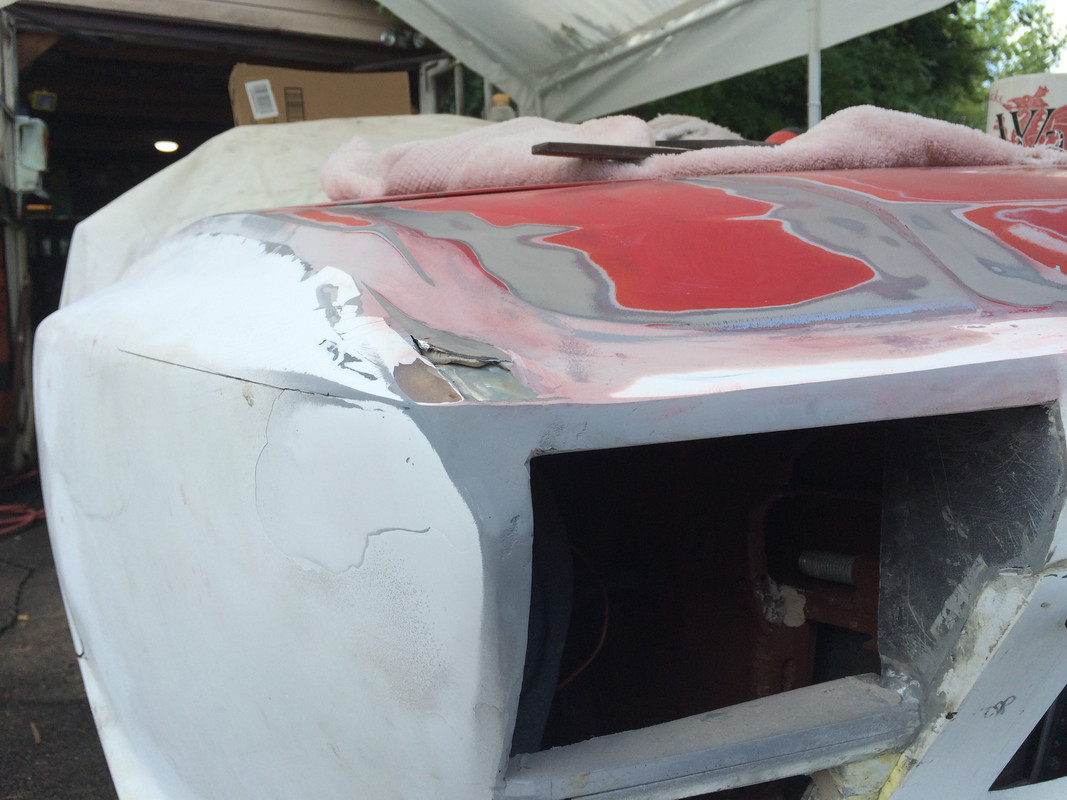
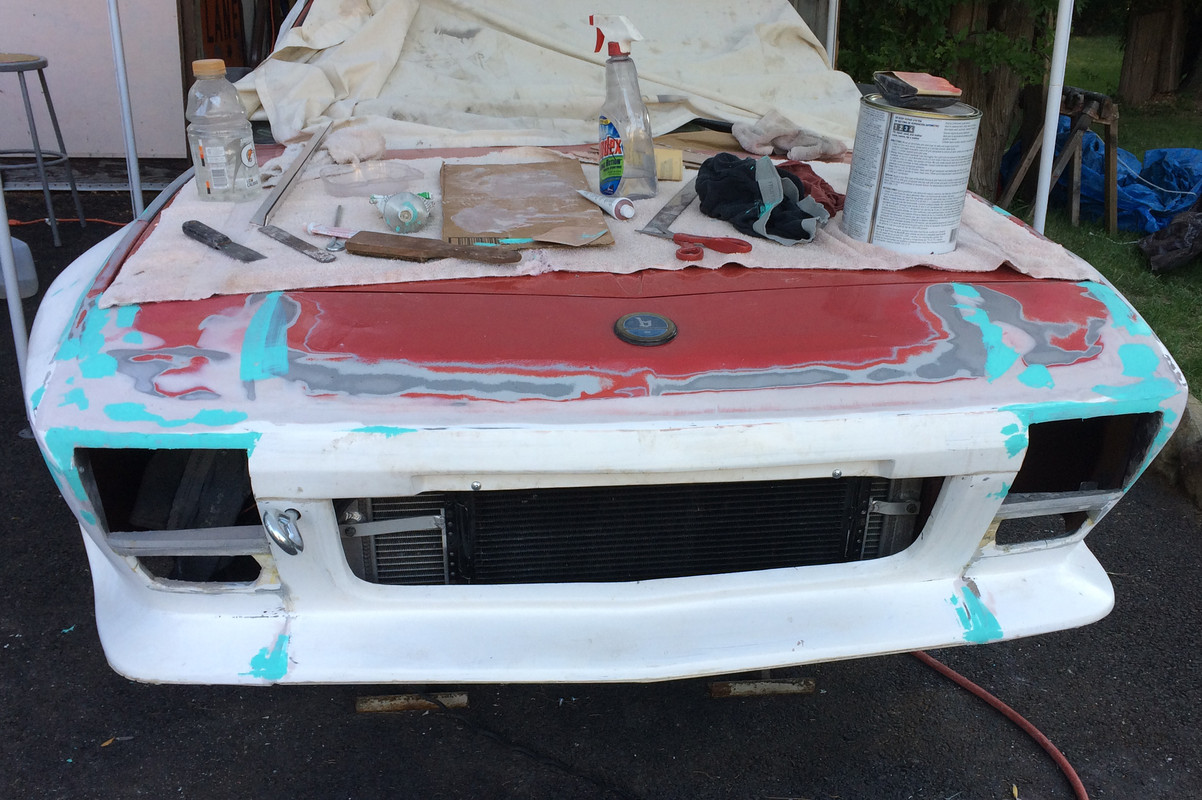
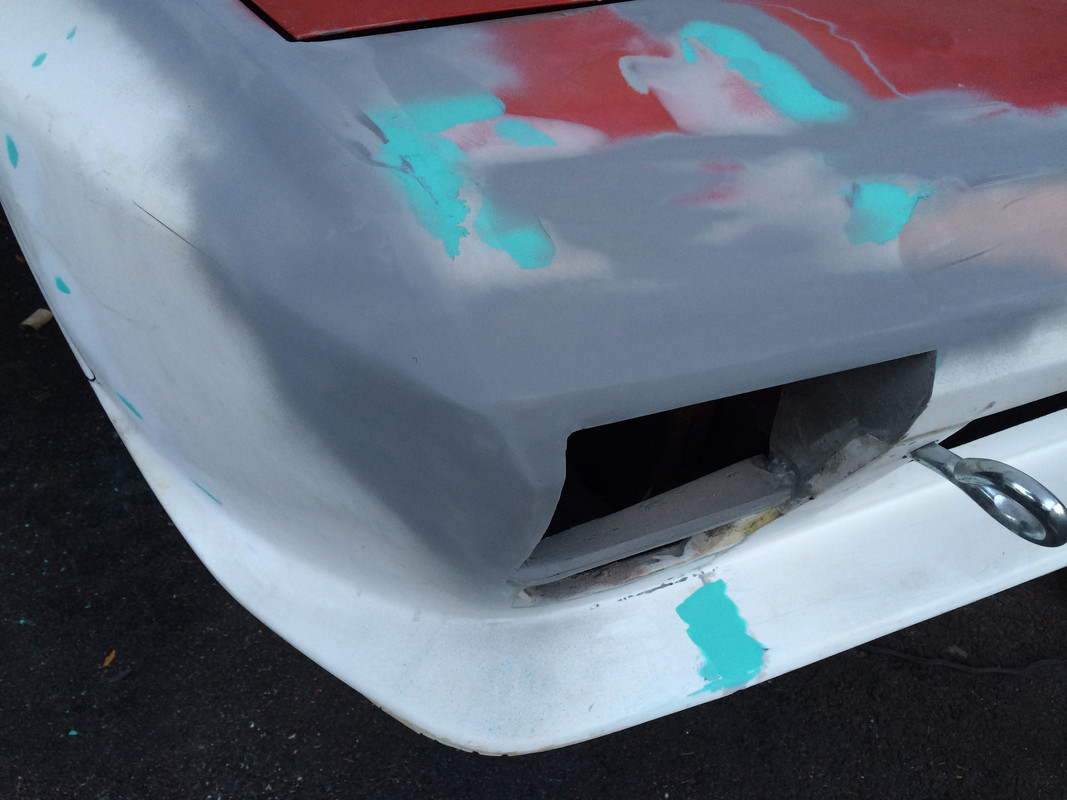
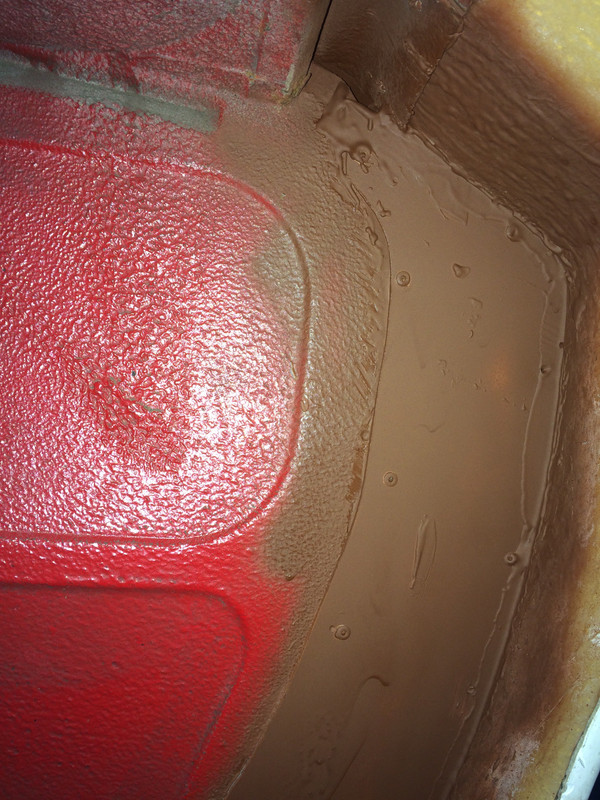
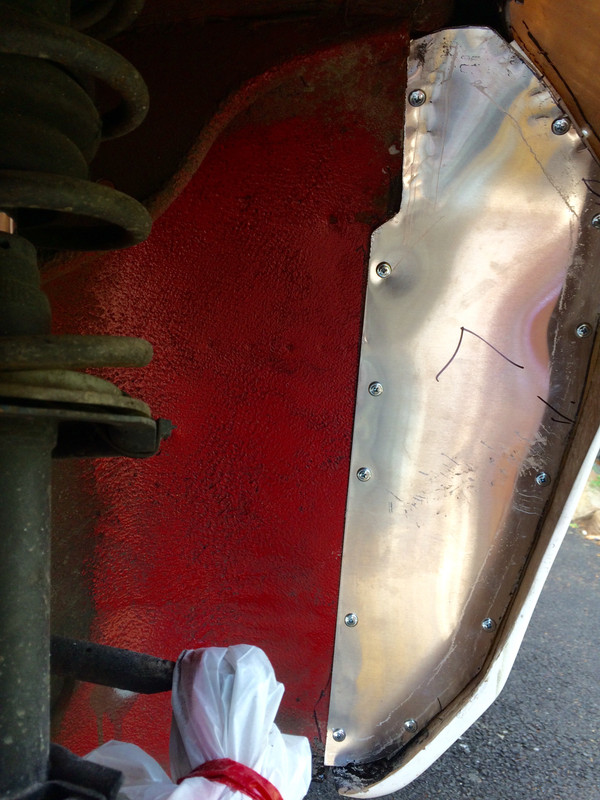
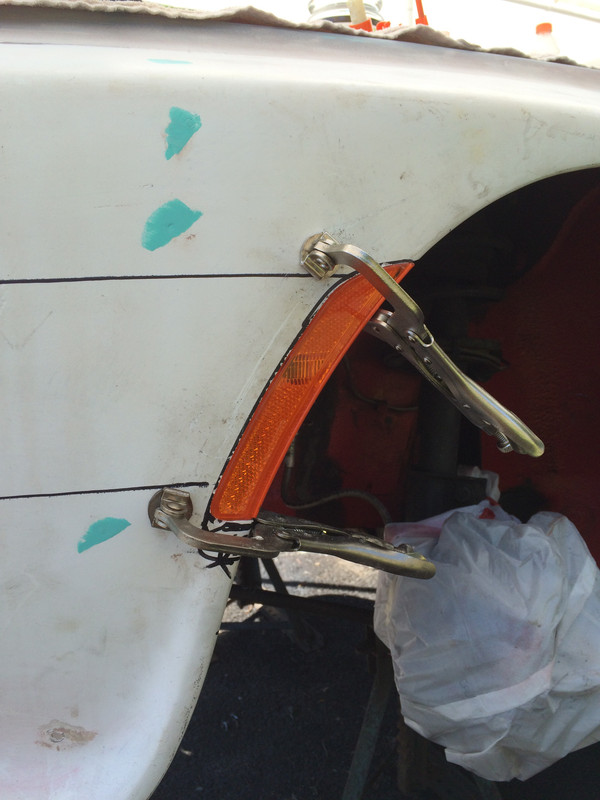
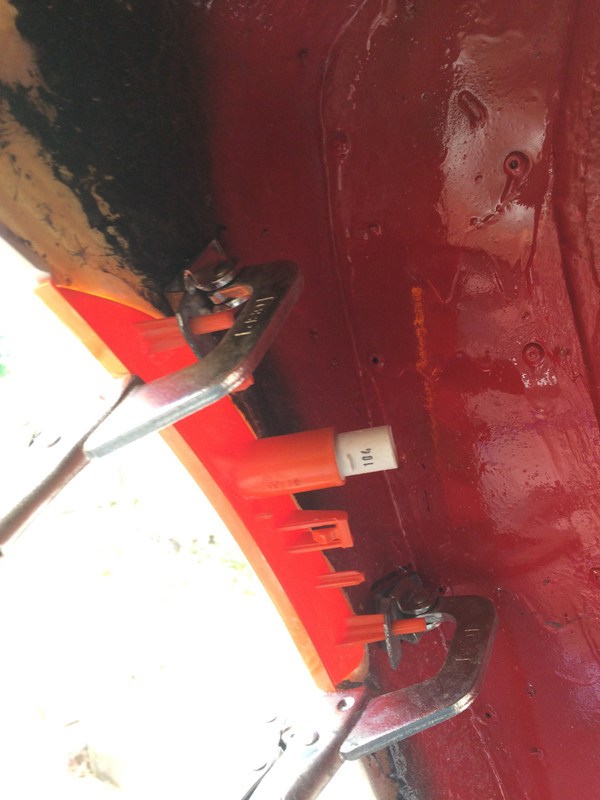
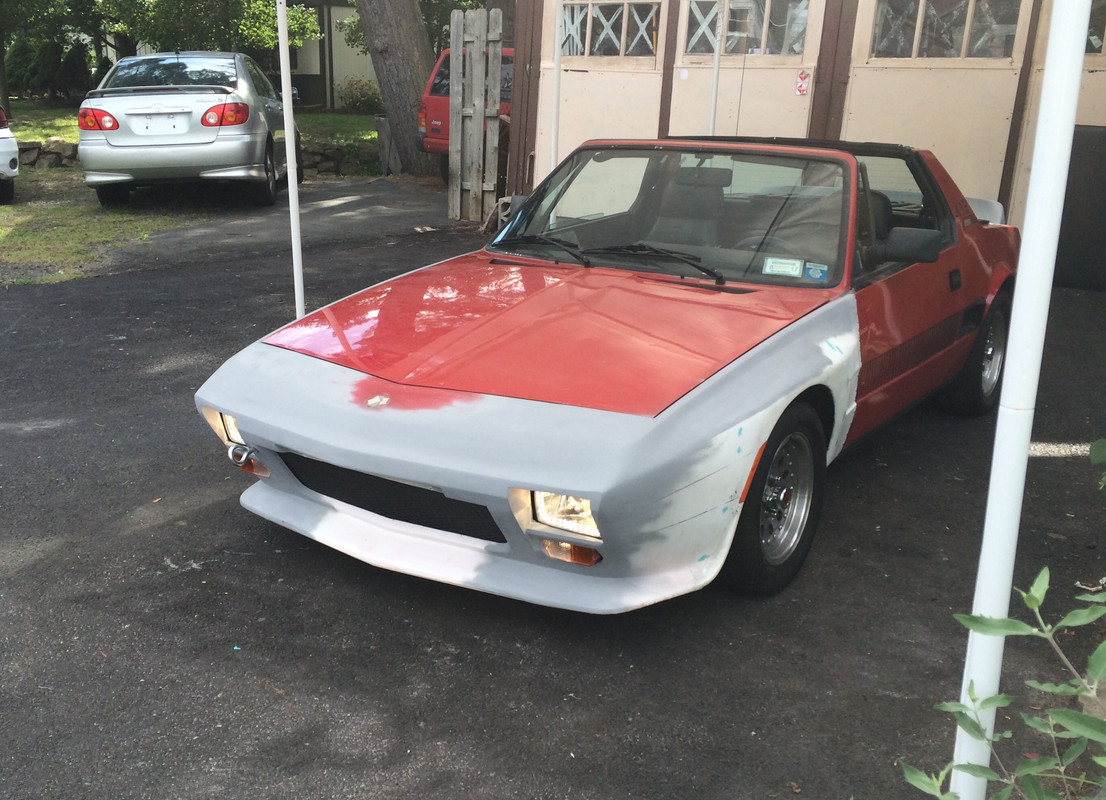
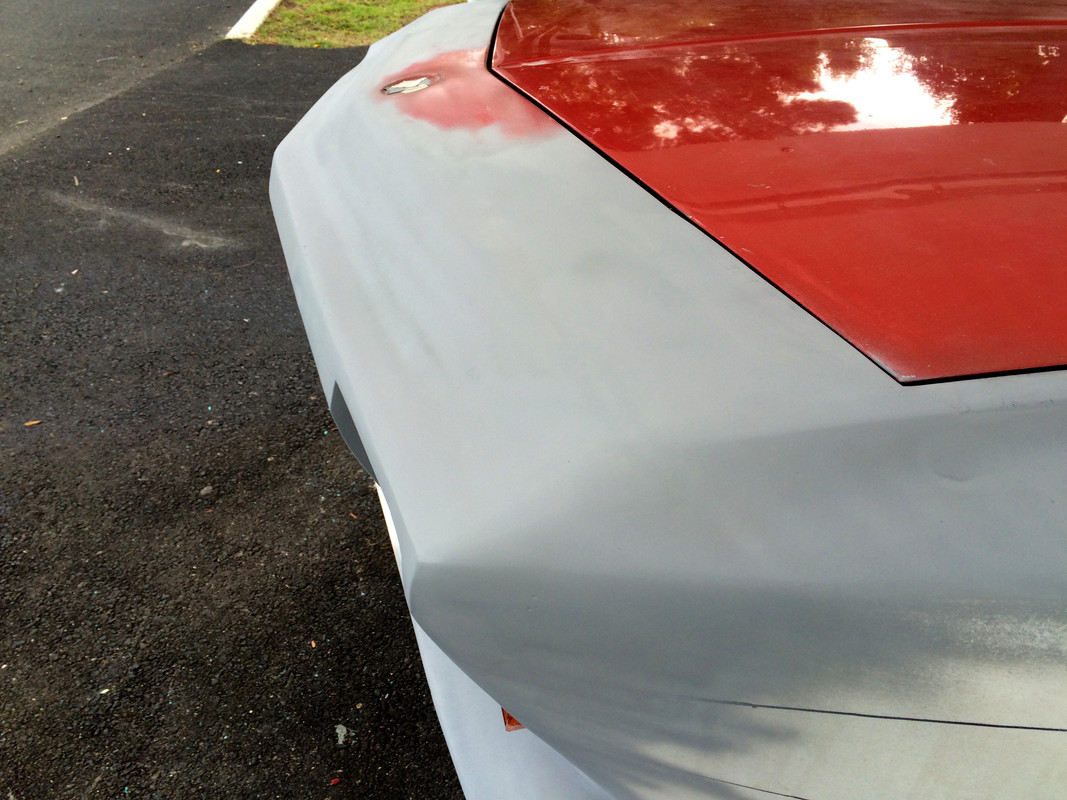
Took a few minutes to contour the right nose tip - took it down to the panel edges

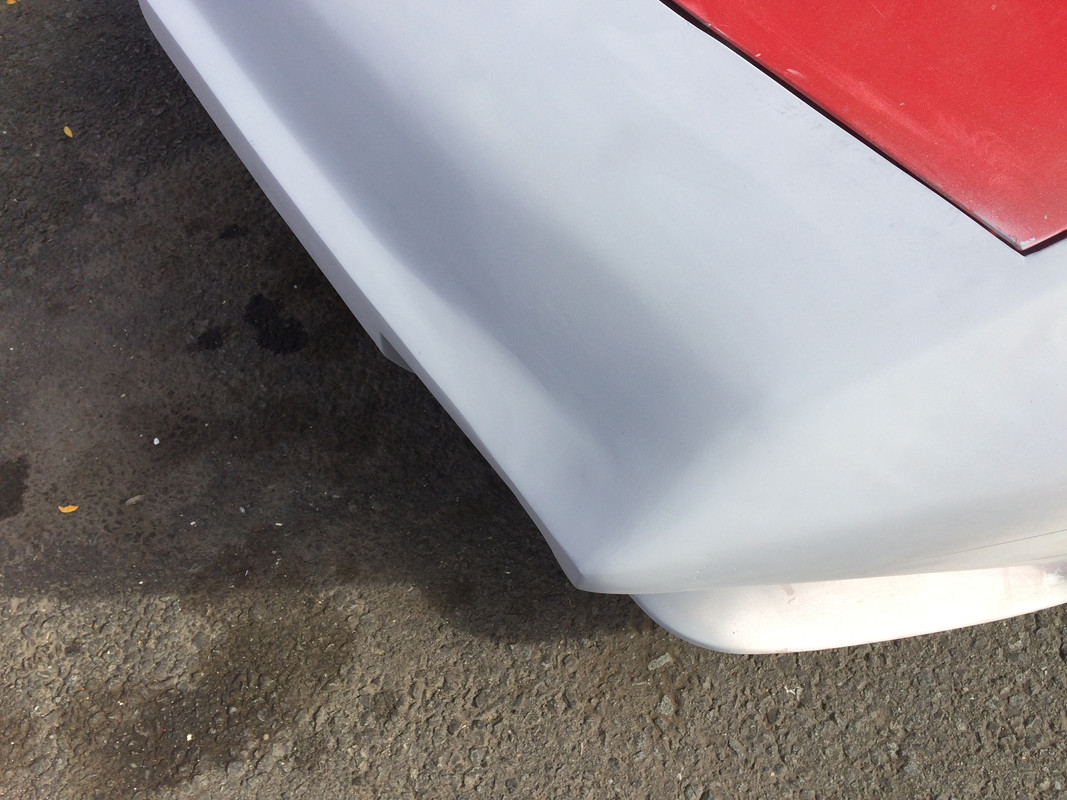
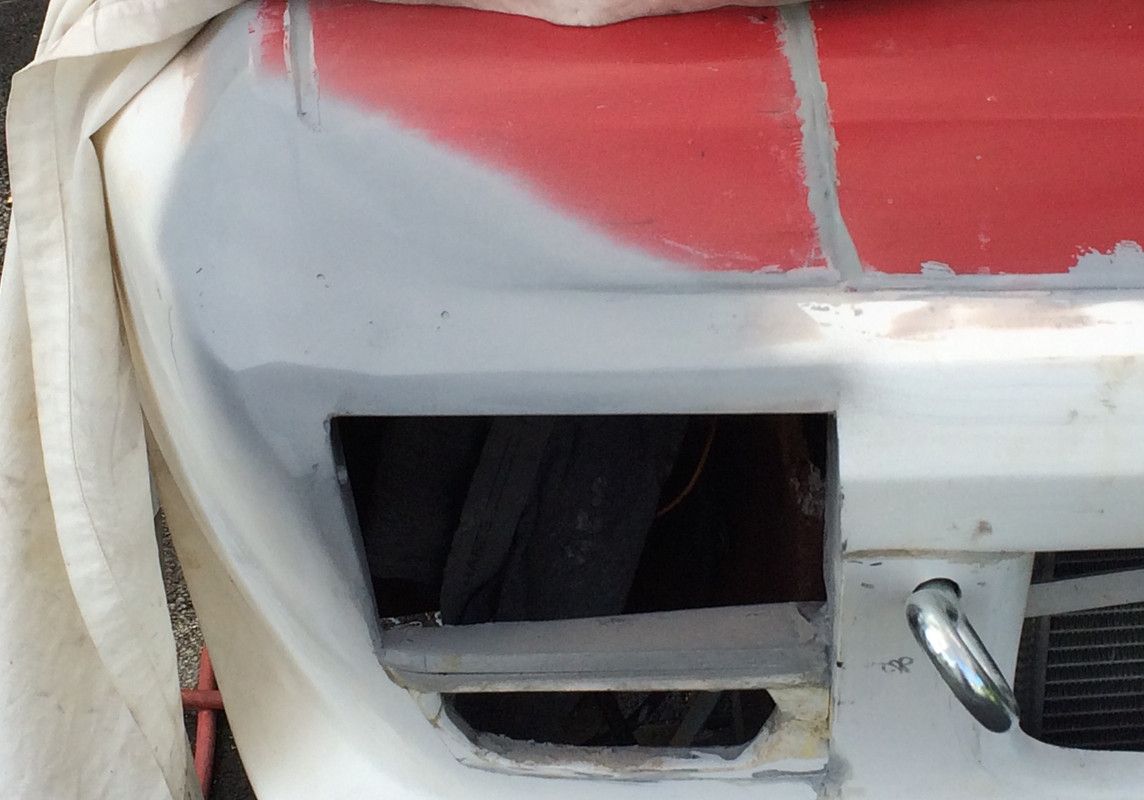
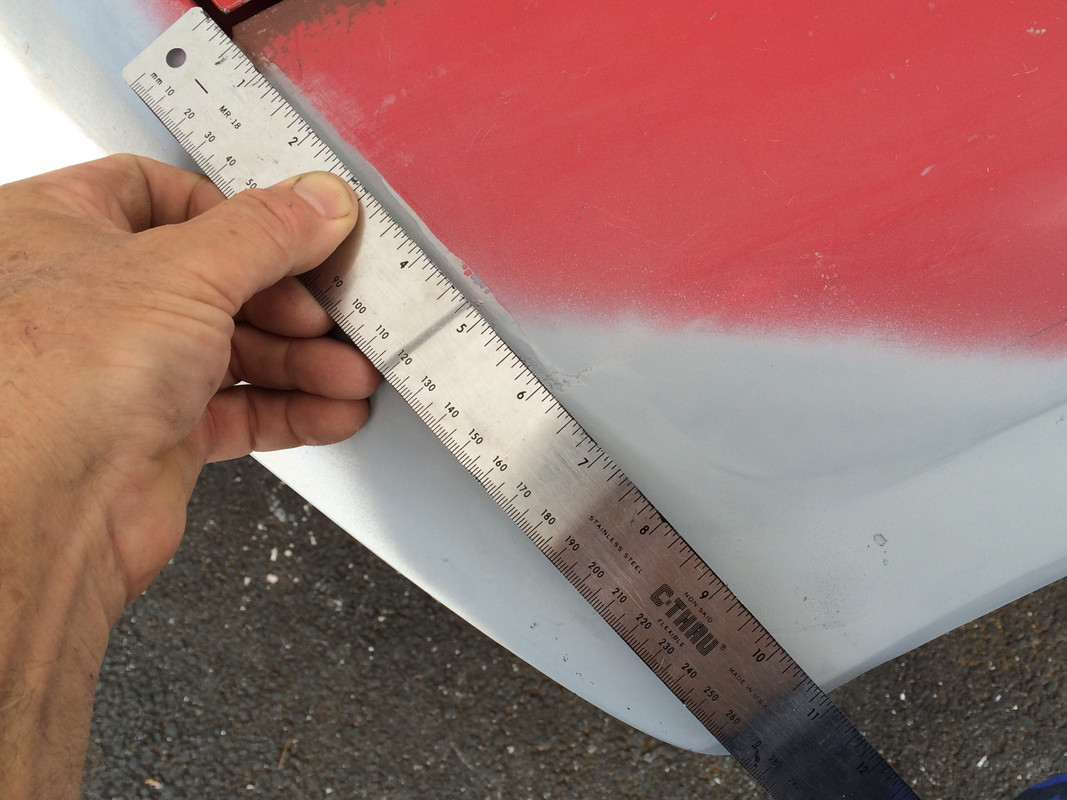
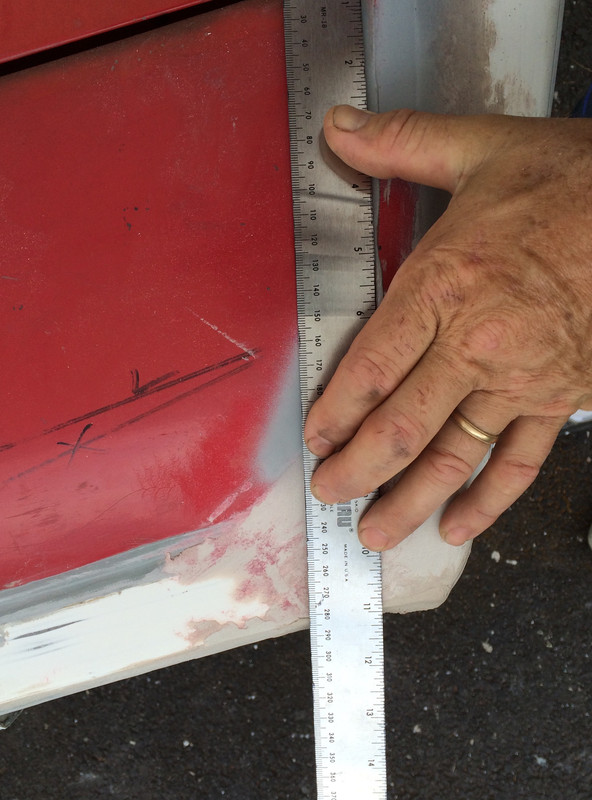
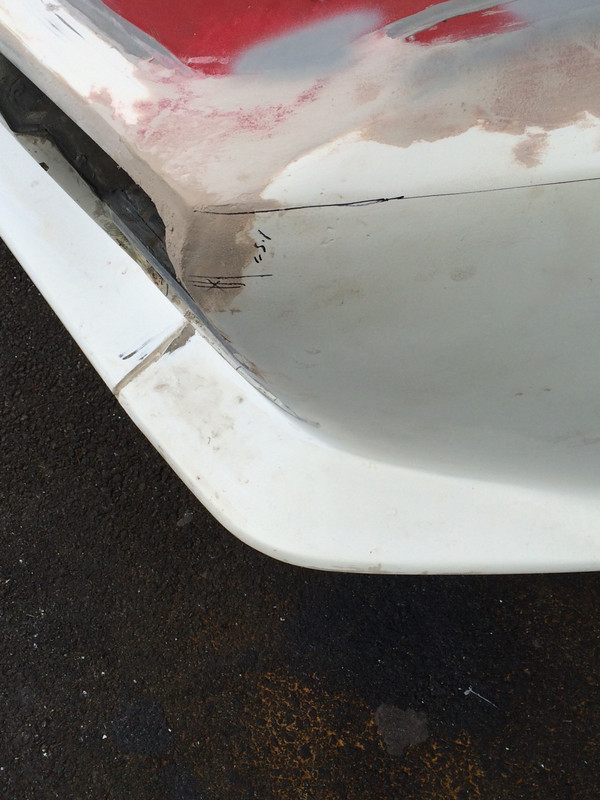
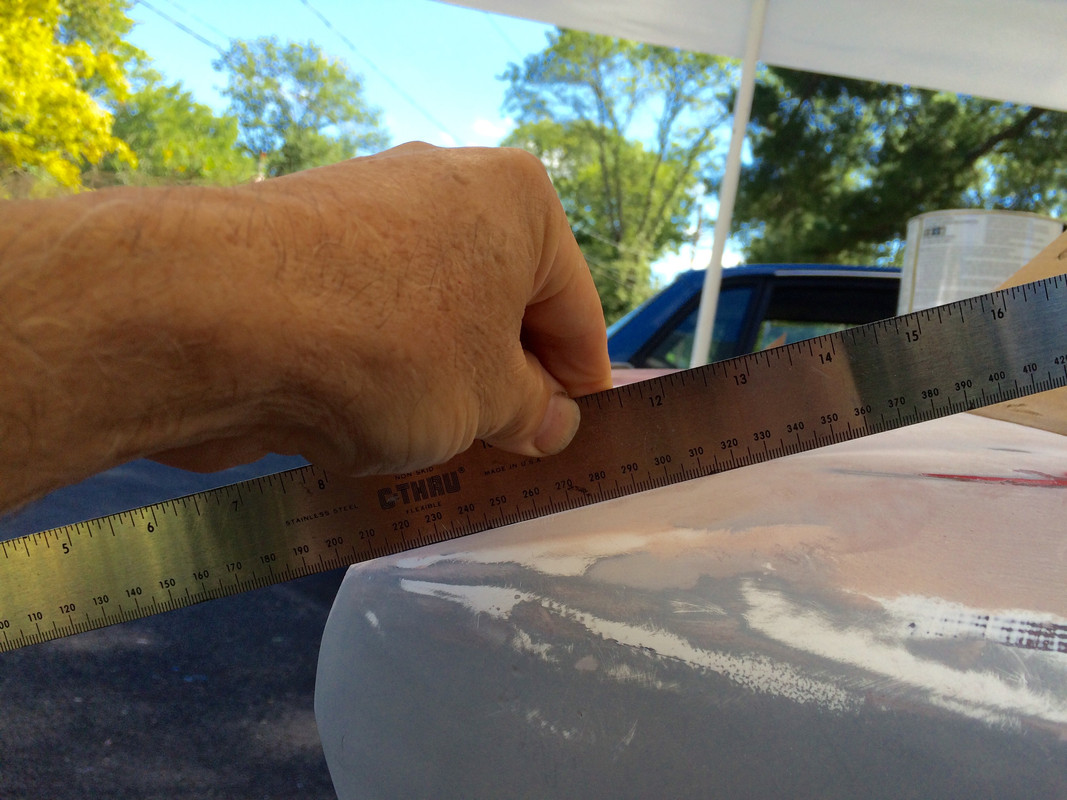
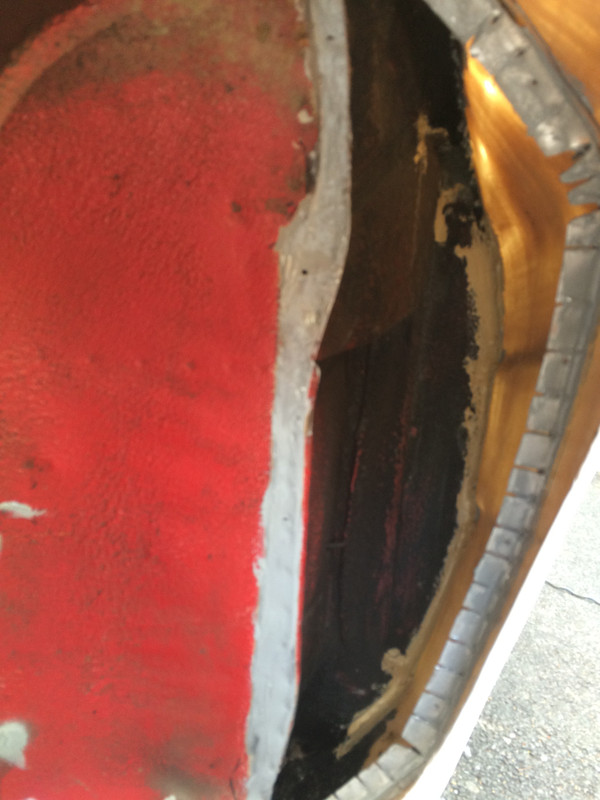
problem is the dip in the front

DallaraNose00043.jpg


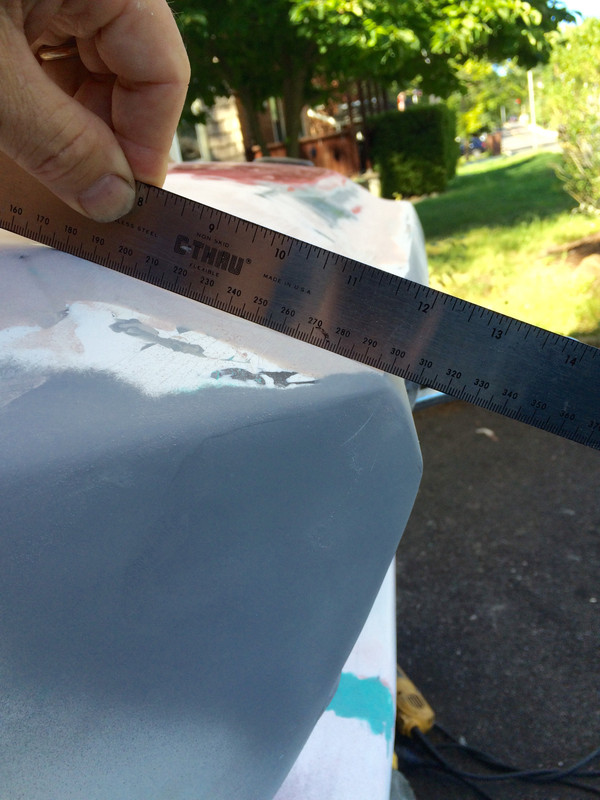
a little primer to help make it obvious

Dallara_Headlamp00020.jpg


Dallara_Nose00049.jpg


Dallara_Nose00049.jpg


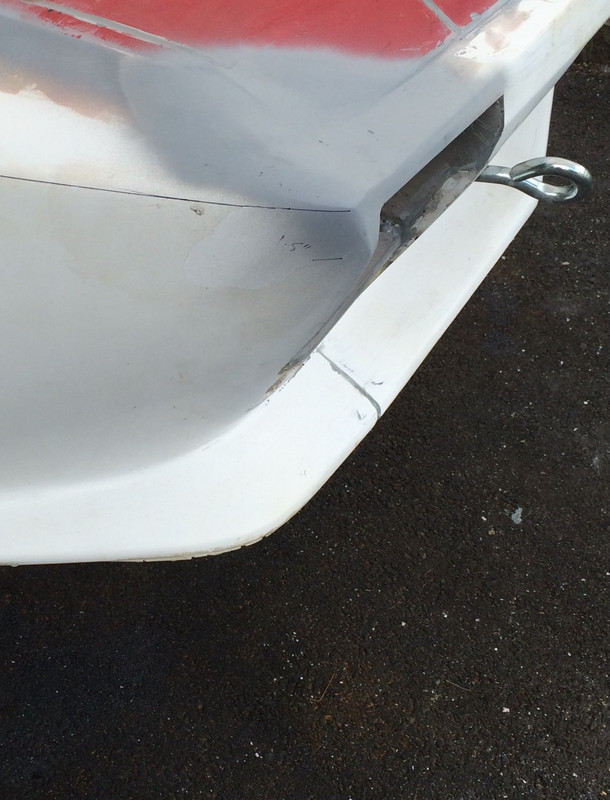
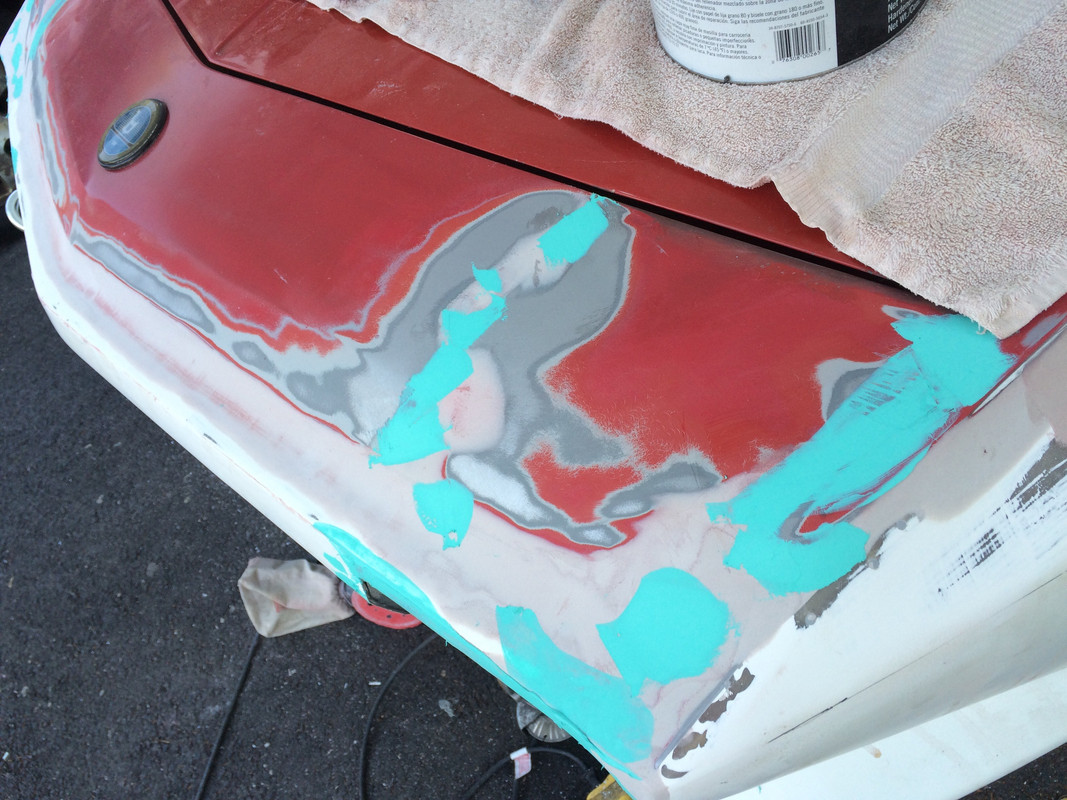
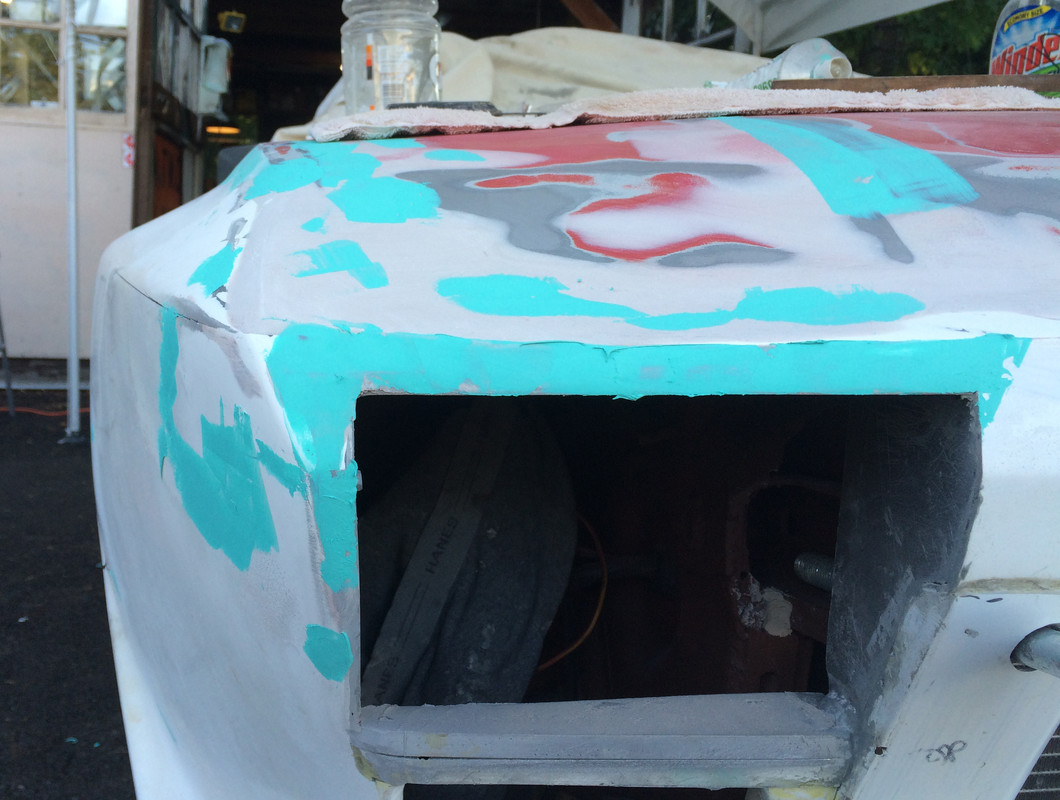
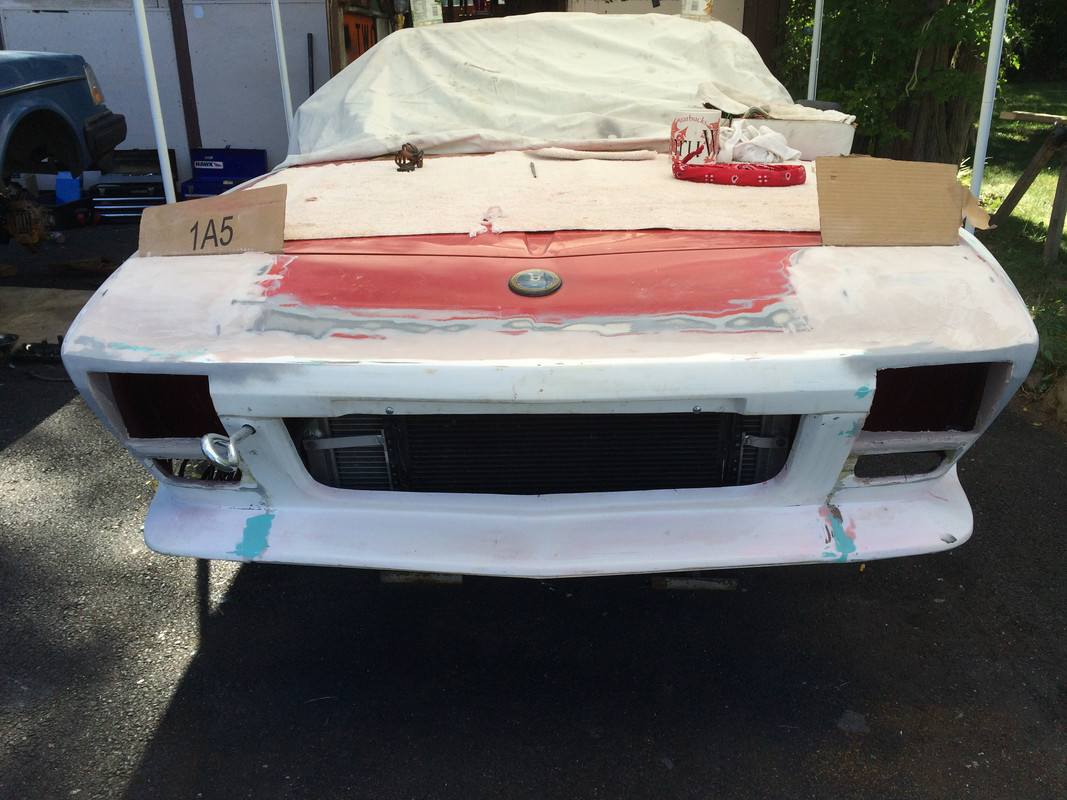
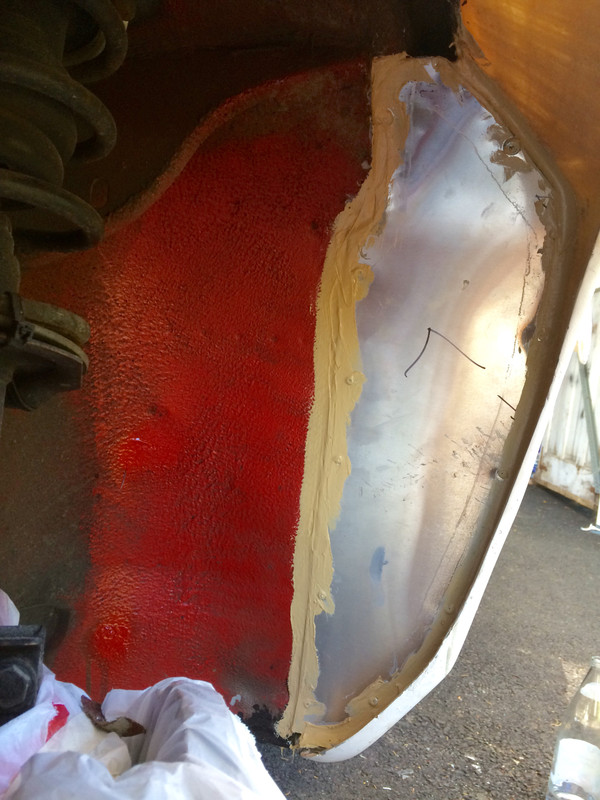
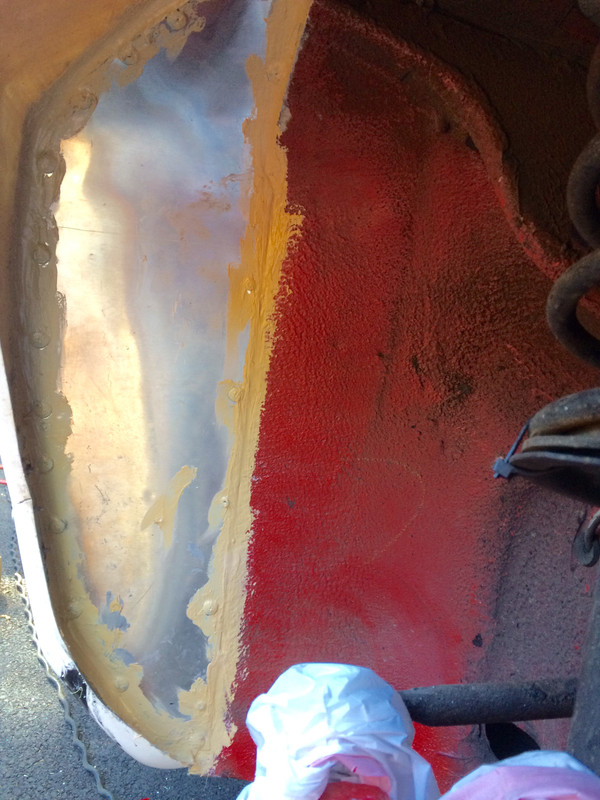
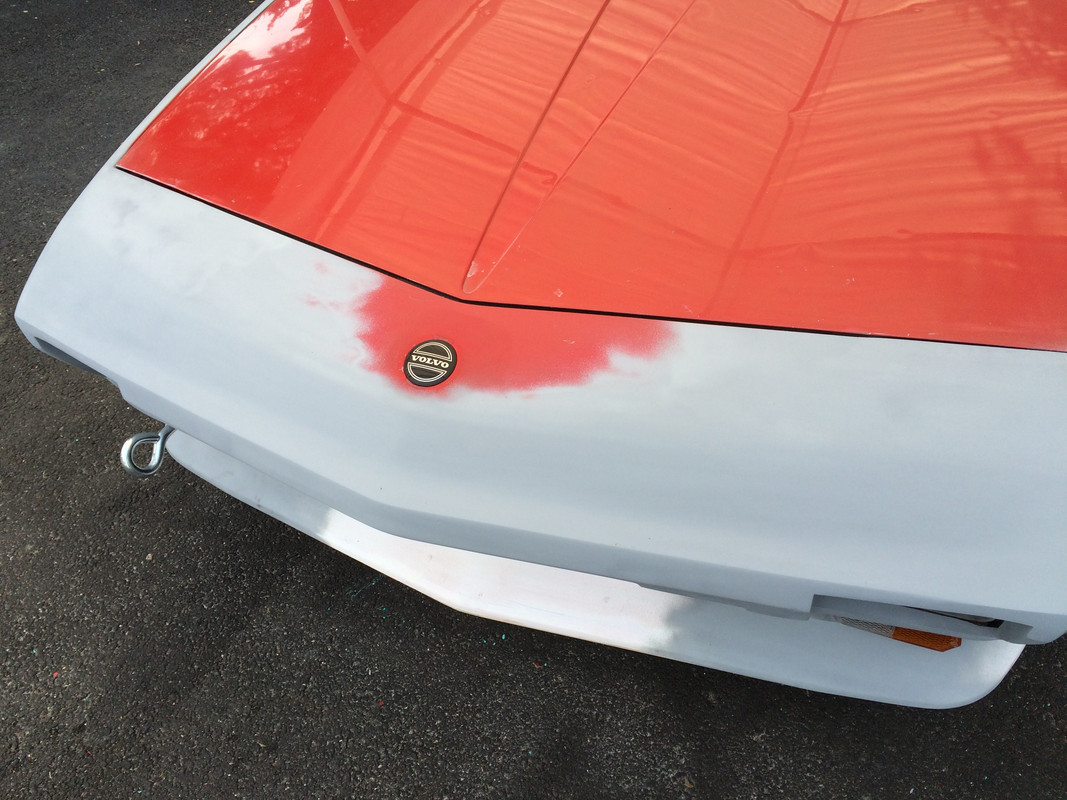
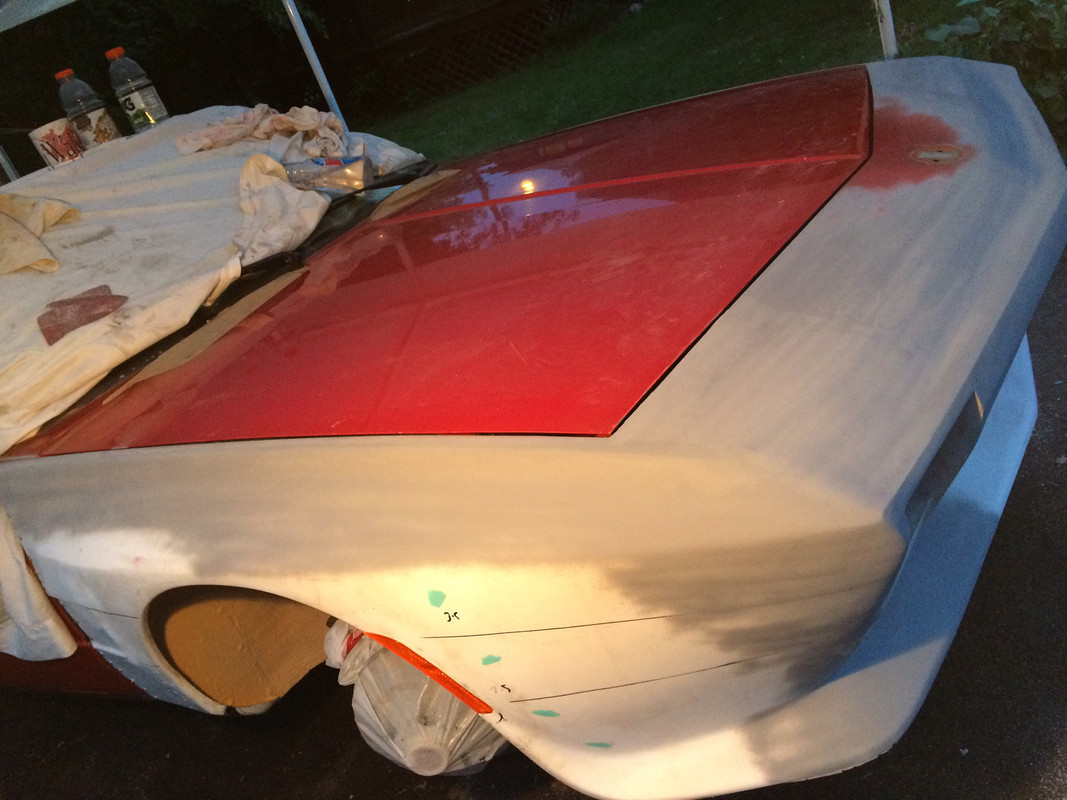
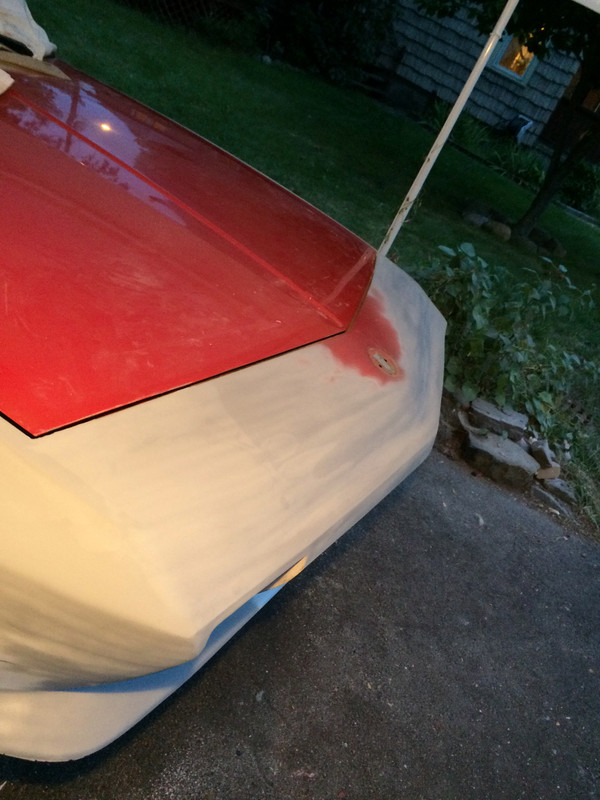
On the left, I added a little putty to level it out and bring it out to the same length-

DallaraNose00048.jpg


DallaraNose00047.jpg


Dallara_Nose00046.jpg


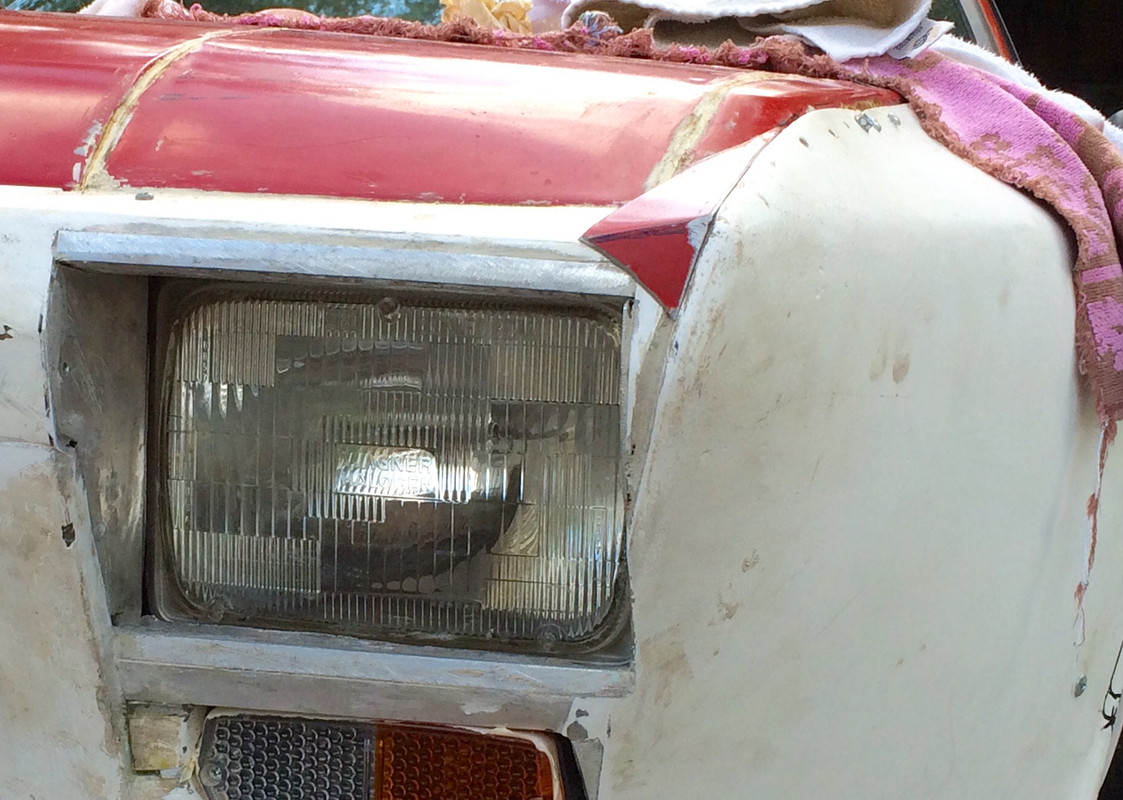
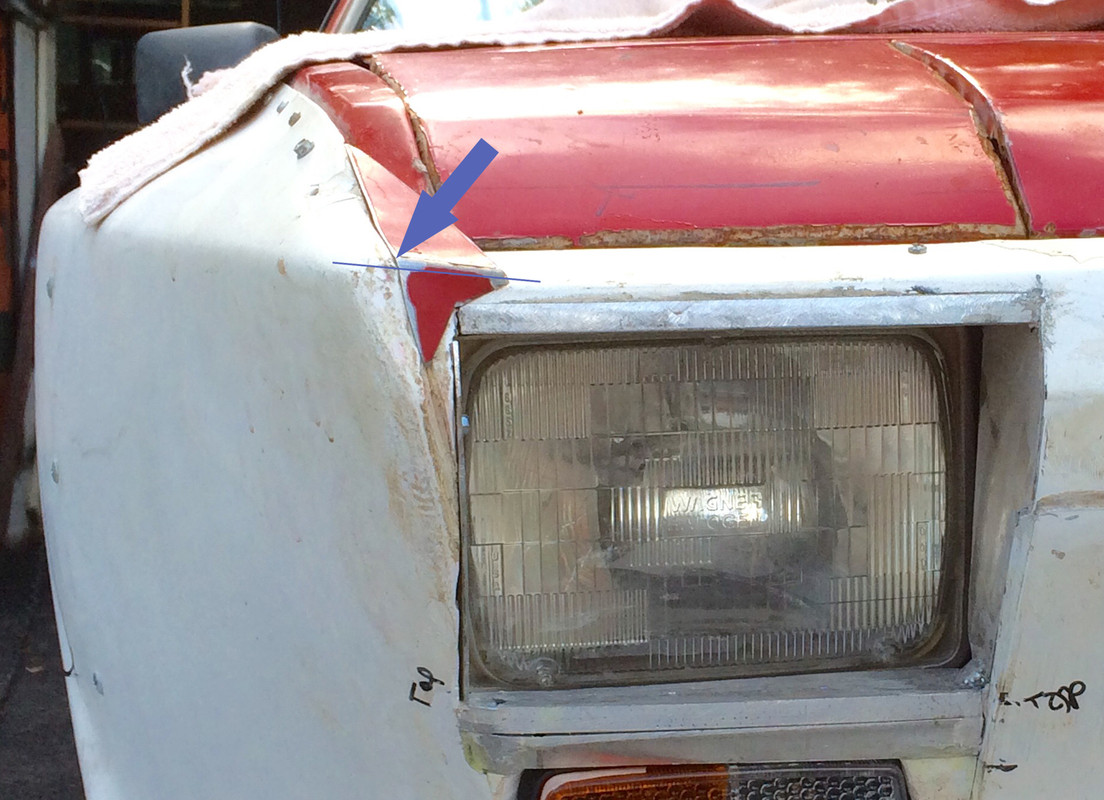
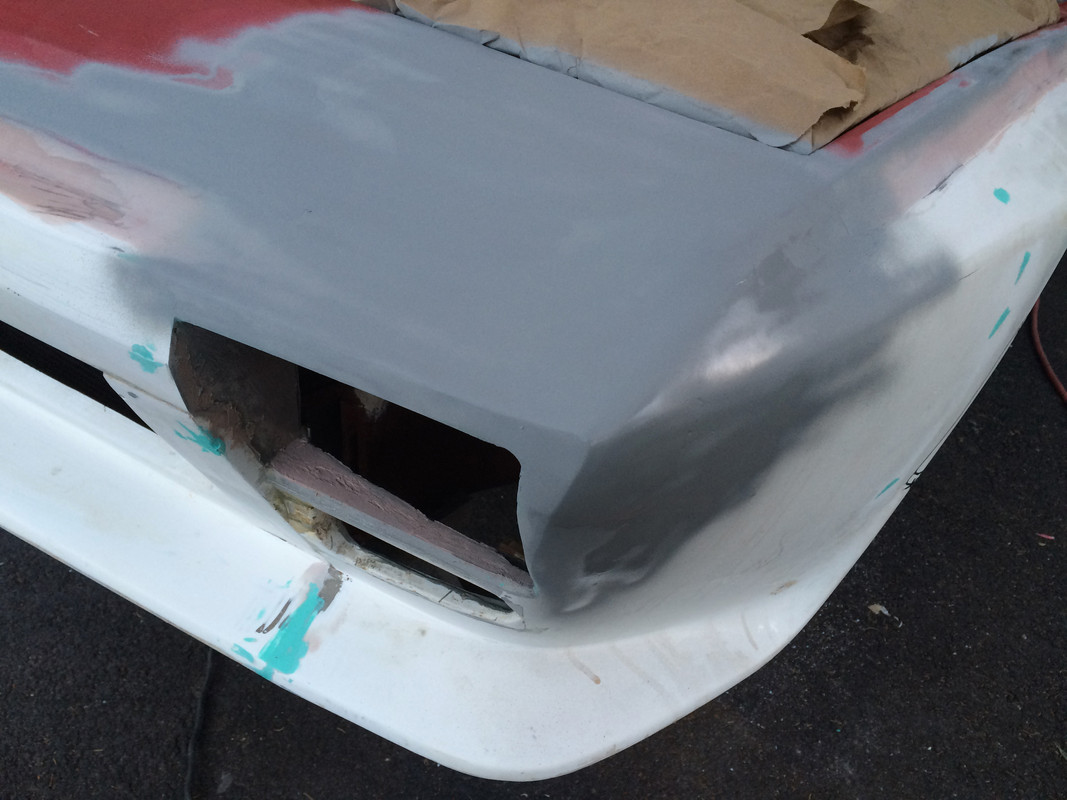
- basing it off the pics of Matt's car where the four lines converge - having the curve of the headlamp pod actually helps hide the tapered fill off the fender into the nose...

rodin-c.jpg


Which means I need to take a chunk off the top right fender, and fill in some more above the headlamp. Hoping there's enough substance to the tip to accomplish that without eating through. May have to average it out & accept some deviation left/right.
 
Last edited:
I would look at building up the inside of the corner ahead of time, perhaps packing tiger hair into the corner itself and then adding some cloth over that to contain and reinforce the area and joint.

That way if you do bust through the original parts you know it as you are doing it but are continuing to work a surface without having to reinforce after the fact which never goes well.

Looking good.

Thanks for the tips, Karl. I was thinking that it would be wise to add some backing before I cut it down.

Looking back through earlier pics, I can see where the problem lies:

left fender tip

Dallara_Headlamp00014.jpg


right fender tip - I should have filed down the tip before making the filler piece, I just didn't register it.

Dallara_Headlamp00015b.jpg


I'll work on that when I get back.
 
Last edited:
Alway's learnin'! When you do MINE you oughtta have...

worked out all these little details!

Remember to build and pop off a mold with a COMPLETE front and rear clip so you can make mine a much easier project.

I'm just trying to save you a lot of unnecessary time and trouble. I'm sure there are many PAYING members here that will appreciate your effort as well~!

HA!

Good idea, however somehow I don't think I'll be making molds anytime soon, Tony :rolleyes2:

I can't imagine billing someone for the man hours involved in this.

I also think of it as a labor of love - doing it as a paying job wouldn't be the same, plus I'm more forgiving of work for myself than I would be if I were doing the job for a customer - I think I would find it an impossible task, honestly.

I do hope I get it finished for the Carlise Import Show next Spring....
 
Worked on the nose section today.

Ground down the right side to get rid of the upper ridge I had.

Dallara_Nose00042.jpg


Bondo'd, sanded & puttied the nose, also working on trying to level the headlamp cover panels

DallaraNose00040.jpg


DallaraNose00044.jpg


Dallara_Nose00055.jpg


Worked on the left fender junction - had to shave a fair amount to taper the fiberglass to get the angle right. The left fender sits higher on the sheet metal than the right (using nose tip and rear cutout alignment with doors as overall guides)

Dallara_Nose00042.jpg


Right side

Dallara_Nose00087.jpg


filled and filed the right side to get the angle right off the stock fender tip down to the nose junction.


Left side

Put some primer on it to cover the bare metal & get a sense of overall levels. Difficult to see in pics with matt paint, the lack of reflection masks deviations, however it is pretty good overall.
\
DallaraNose00067.jpg


Corners look OK so far, more detail work of course...
DallaraNose00065.jpg


DallaraNose00066.jpg


Right side pod cover needs more filler to level it out at the back edge

Dallara_Nose00056.jpg
 
Last edited:
Great Work

Joe

Nice work. Now that your going through the Dallara Build do you think the price people are asking for them once they are finish is reasonable? How is the Tow Hook integrated?

Enjoy the build.
 
Joe

Nice work. Now that your going through the Dallara Build do you think the price people are asking for them once they are finish is reasonable? How is the Tow Hook integrated?

Enjoy the build.

Thanks!

I don't know what the going rate is for Dallara converted cars at all :rolleyes2: All I can say is that the number of man-hours involved far outweighs whatever retail value the car may have...

The tow eyelet screws into a threaded barrel welded into the frame rail extension where the bumper shock used to be. I would not leave the eyelet in place for normal use.
 
Last edited:
Spent a little time on the X today. Got the headlamp bucket adjusters made - silver soldered allen keys to the adjuster screws so that they can be accessed from the top access cavity.

DallaraHeadlamp00050.jpg


Reassembled

Dallara_Headlamp00051.jpg


Dallara_Headlamp00049.jpg


Then I cut out the inner support panels & got the right front (reardward) side test fit with the angle reinforcement attached to the fender

Dallara_Wheel_Arches00005.jpg


Front fender forward areas just need body seam caulking where I cut it up, and where the support panels attach to the stock steel inner wheel arch

DallaraWheelArches00013.jpg


Need to get some filler on the headlamp openings in the nose section.

Hopefully I'll get all that wrapped up tomorrow, then the headlamps can go in - I need to get it inspected on Wednesday before it expires.
 
Last edited:
Spent a little time on the X today. Got the headlamp bucket adjusters made - silver soldered allen keys to the adjuster screws so that they can be accessed from the top


58F896BE-5477-4CE7-BACD-E232F3B9E51F_zps0dxzcae5.jpg


Reassembled


51BA6482-B8D7-4C10-93B7-E23F5A670E41_zpsjrvqz5lt.jpg


7B312091-4076-47E0-BC4A-AC4746CE1137_zpsv4zlyvmj.jpg


Then I cut out the inner support panels & got the right side test fit with the angle reinforcement attached to the fender


2DC315E7-94CE-4786-A78E-4A462583636A_zpslhes5fyf.jpg


Forward areas just need body seam caulking where I cut it up, and where the support panels attach to the stock steel inner wheel arch


74EFB592-C389-4BD1-90C9-0819B739DFB9_zpsd8zqziow.jpg


Need to get some filler on the headlamp openings in the nose section.


Hopefully I'll get all that wrapped up tomorrow, then the headlamps can go in - I need to get it inspected on Wednesday before it expires.


Looking great Joe. Well done. I have always loved the Dallara body lines and had contemplated doing it one day. That is until I saw this excellent thread, way, way above my skill level. Respect.


Sent from my iPhone using Tapatalk
 
Looking great Joe. Well done. I have always loved the Dallara body lines and had contemplated doing it one day. That is until I saw this excellent thread, way, way above my skill level. Respect.

Sent from my iPhone using Tapatalk

Thanks!

It's beyond any level I've ever done, that's for sure.

The support structure and basic fitment is not difficult, it's the filler & detail work that's VERY time consuming. Not sure how I can determine whether I have the panels true without putting some top coat on it - need the reflections.

Worked more on the nose today. More filler to level out the pod panels with the fenders & nose. Using a long rough file that can bridge fender & nose.

DallaraNose00060.jpg


DallaraNose00059.jpg


line from fender tip to nose is pretty good now.

DallaraNose00050.jpg


DallaraNose00051.jpg


Worked on the front fender inner supports, they are all done now.

Test fit DS inner rearward panel.

Dallara_Wheel_Arches00004.jpg


Sheet metal stripped bare & primed with the epoxy, angle support bonded to fender & primed for the cover panel. Inner back seam filled with seam sealer

DallaraWheelArches00002.jpg


Front fender left and right rearward panels bonded, and seam sealed after 2 hours.

DallaraWheelArches00008.jpg


DallaraWheelArches00009.jpg


Front fender to sheet metal seam ground flush & seam sealed

Dallara_Front_Fender00009a.jpg


DallaraFrontFender00009.jpg


Tomorrow I can coat them with the 3M body (08864) & rubberized (08874) schutz.
 
Last edited:
Got the front fenders cut for the side markers. Raised them a little over original position after I decided I am going to do the Dallara stripes.

DallaraWheelArches00044.jpg


Brackets

Dallara_Wheel_Arches00046.jpg


Bonded - need to get the retaining cap nuts for the markers, and the electrical connector/pigtail. No luck finding them so far, may have to resort to going to an actual dealership to locate them. edit - PN 68065018AA pigtail/harness

DallaraWheelArches00048.jpg


DallaraWheelArches00045.jpg


Some detail work between the marker & fender needed. EDIT: There is a grommeted wire pass-through in the aluminum support not shown here.

Inner fenders coated with the rocker schutz

Dallara_Wheel_Arches00006.jpg
 
Last edited:
Worked on the headlamp and marker wiring. Swapped out the stock plastic HL connectors for ceramic versions, since I will be using 80/100W H4 bulbs.

After that, spent some time filling and sanding the nose & fender tops some more. Got rid of more ripples in the DS panel, and a ridge in the PS.

Had to prime it again to see how it looks. Need to finish the rough work on the HL opeings, so I can get the lights in. Much more detail work on the fenders & nose, of course.

Dallara_Nose00075.jpg


DallaraNose00073.jpg


Dallara_Nose00072.jpg


Dallara_Nose00079.jpg
 
Last edited:
Worked on the headlamp and marker wiring. Swapped out the stock plastic HL connectors for ceramic versions, since I will be using 80/100W H4 bulbs.

After that, spent some time filling and sanding the nose & fender tops some more. Got rid of more ripples in the DS panel, and a ridge in the PS.

Had to prime it again to see how it looks. Need to finish the rough work on the HL opeings, so I can get the lights in. Much more detail work on the fenders & nose, of course.

IMG_0060_zpseepqjoei.jpg


IMG_0065_zpsa1rfz5vb.jpg


IMG_0064_zpscokhdren.jpg


IMG_0062_zpsphsxxxdy.jpg


Looks really good Joe. Can't wait to see the finished product, one for the books.


Sent from my iPhone using Tapatalk
 
Another round of filling and sanding. Still needs more, but I'm done for now - need to get started on the rear.

DallaraNose00093.jpg


DallaraNose00094.jpg


Lights and markers in place

Dallara_Headlamp00021.jpg


Bulb access
DallaraHeadlamp00030a.jpg


DallaraHeadlamp00030.jpg
 
Last edited:
That looks seriously cool! :love:

Thank you. :)

Took it out & got the State Inspection taken care of.


Out in the light, I can see where the right fender tip will need some work

Dallara_Nose00081.png


... compared to left - which also needs filling / blending where it dips in by the pod cover area

DallaraNose00071.jpg


Test fit the 15" wheels - 205/50x15 in front

slight problem with the wheel arch clearance when wheel is turned

DallaraWheelArches00025.jpg


strut - wheel clearance

Dallara_Suspension00012.jpg


Need to get the coilovers in & remove the wheel spacer - hopefully that offset will give the clearance I need, otherwise I'll be reworking the rear arches
 
Last edited:
Took out the one Fiat wheel spacer. With the Vic's brakes there is still a spacer behind the rotor - otherwise the tire would hit the spring seat

Dallara_Suspension00012.jpg


Shaved the front inner wheel arch rearward lip on both sides - there was over 1/2" lip

Dallara_Suspension00003.jpg


No more contact, even at full drop

Dallara_Front_Fender00001a.jpg


Space in front at full lock - I pushed the panel forward at Matt's suggestion when I started.

DallaraWheelArches00049.jpg


With that resolved, I put the Coilovers in - with no pretension on the coil it sits at pretty much stock height - see what happens after I drive it a bit. May need to switch to 8" coils to drop the front.

Dallara_Suspension00013.jpg


Wheel offset looks good 15x8, ET 0), which means I only need 73/58.3 hubcentric rings to take care of the front wheel mounting, no spacers at all.

Dallara_Front_Fender00038.jpg
 
Last edited:
Taped up the rear panels to make preliminary markings. Using body side indents by door and notch at rear upper of panel as alignment guides. Wheel offset will be checked after I get the panel screwed in place.

Dallara_Rear_Fender00023d.jpg


Dallara_Rocker00000.jpg


Left & right at 23 1/4 -3/8" (from the ground)

Dallara_Suspension00018.jpg


Dallara_Suspension00008.jpg


EDIT: Low beams

DallaraHeadlamp00015.jpg


DallaraHeadlamp00033.jpg


High Beams

DallaraHeadlamp00040.jpg


DallaraHeadlamp00005.jpg


May actually need to lower them a little.
 
Last edited:
Back
Top